
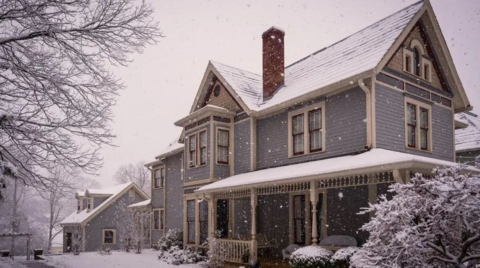
How to Winterize Your Home Winter 2023


Starting in the Fall, before winter comes along and before the temperature drops below freezing, it’s always a good idea to ‘winterize’ your home. Winterize means to prepare your home for cold, freezing temperatures. Winterizing your home can help save on energy costs and keep your home nice and warm during the winter.
Ensuring you have everything you need before is always a good start. Some items you may need would be a shovel, a snowblower, and de-icer agents like rock salts. However, there are better choices that include ingredients like calcium, magnesium, and potassium chloride. (Always be careful which de-icer you choose, as some may cause chemical burns to your pets’ paws; always check the warning and safety instructions if you have pets and use de-icing agents for your steps and walkways.)
Here is a list of materials you may need to winterize your home and some helpful tips:
Tools and Materials:
- Shovel or snowblower (or both)
- Space heater (for emergencies)
- HVAC Air Filter (change every 2 to 4 months)
- Weatherstripping
- Door seals and or doorsweeps
- Gap fillers
- Caulk
- Pipe insulation
- Emergency supplies
- Ladder
- Broom
- Emergency supplies
- Gas powered generator
- Window Insulation Kit (optional, if needed)
Step 1: Maximize Heating Options
- Keep one non-electrical heating source on hand in case of a power outage, or your furnace breaks down.
- A gasoline-powered generator can power your electrical heat sources like space heaters, water heater or any cell phone or tablet during power outages or power outages due to winter storms. Larger power generators may use diesel, gasoline, propane (in liquefied or gaseous form), or natural gasoline, while smaller engines are powered by gas. (Power generators are not meant for indoor use due to the level of carbon monoxide {CO}, which can be deadly. Do not use a power generator in the house, garages, sheds, or crawlspaces.
- If you do need a space heater in your home, always remember to read the safety warnings and precautions. The National Fire Protection Association recommends having chimneys, fireplaces, and vents professionally inspected once a year.
- If you use firewood, stock up, keeping it off the ground and at least 30 feet away from your home so it stays dry and pest-free.
Step 2: Inspect the exterior of your home
- Inspect the roof and clear the gutters of any leaves or debris that may cause blockage.
- Always clear any standing water on walkways, steps, and driveways, as it will freeze and may be potentially dangerous.
- Inspect air ducts.
- Walk around your home and carefully inspect the windows and doors for gaps and cracks. Look for gaps near plumbing lines and wiring around HVAC, ductwork, and where your foundation meets the house. These gaps and cracks can let in air or moisture, leading to more significant problems like water damage, mould, and higher energy costs. To protect and insulate your home, seal these gaps and cracks with a caulk or sealant (more information on those below).
- If you have a chimney you do not use consider installing a ‘Chimney Balloon’ to keep the cold air out.
Step 3: Protect against Mould
- As relative humidity climbs inside the home during winter it can create an ideal breeding ground for black mould.
- If you have condensation forming on the inside of your windows during winter it means the relative humidity it is too high inside your home. While running a bathroom or kitchen exhaust fan can lower relative humidity they can also expel heat energy. Instead try to use a well-maintained Heat Recovery Ventilator to help reduce relative humidity in the home without wasting valuable heat energy.
- Invest in a dehumidifier unit to extract humidity from the air. Be sure to empty the accumulated water regularly as these can fill up quickly in homes with high humidity.
- Keep things like blankets, clothing, beds and other furniture away from the walls in the winter to avoid mould buildup in those areas.
- Improve air circulation by using the 'fan' mode on your furnace. Please note this will not heat your home but will help circulate the air within it.
- Running portable fans throughout the home can improve air circulation or be used to dry especially damp areas within the home.
- Once black mould takes hold it can spread quickly and soon cause structural damage requiring expensive repair and replacement to the affected area, so be vigilant!
Step 4: Inspect your Heating System
- Test your heating system before it gets into freezing temperatures.
- Check for gas leaks.
- Test for carbon monoxide.
- Change the HEPA air filter every 2 to 4 months for clean, healthy indoor air.
- Installing a programmable smart thermostat can help save money on your energy bill.
- Install a carbon monoxide detector if you don’t have one. Carbon monoxide (CO) detectors alarm you of any poisonous gas leaks that can be potentially life-threatening.
Step 5: Improve your home's insulation
- Address any draft areas around the house.
- Seal around windows and doors with weatherstripping.
- If you have single-pane windows, a Window Insulation Kit can increase efficiency by up to 90%.
- Caulk around crown mouldings or baseboards if you feel drafts in these areas.
- You may need to replace your door seals and door sweeps.
- Set ceiling fans (if you have one) on low and on a clockwise rotation; this will help the warm air circulate to the floor.
- Make sure to add more insulation to your attic and basement if needed to counteract heat loss.
- Place any insulation covers on any exposed pipes outside.
- Review an R-value chart to ensure you have the appropriate insulation for your region.
Step 6: Create an Emergency Kit in case of power outages
Be prepared for severe winter weather with an emergency kit. Include a three-day supply of the following for each family member, and don’t forget your pets. Ensure you have:
- Bottled water
- Non-perishable food
- Flashlights
- Batteries
- Candles
- Battery-operated radio
- Blankets
- Prescriptions/medicines (including pets too)
- First aid kit
- Food supplies
- Fun activities to pass the time.
Caulks and Sealants:
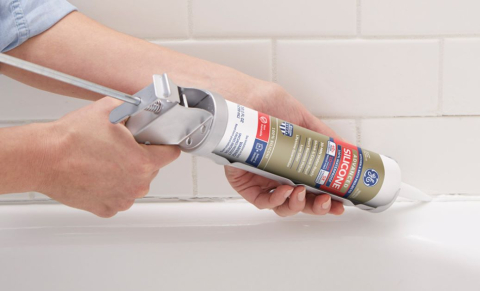
There are various types of caulks and sealants to choose from. Caulks and sealants help seal gaps and insulate by forming bonds between building materials. Sealants are made from flexible polymers like silicone, latex, and expandable foam, and some caulks have both. Silicone and latex come in cartridges that you place into squeeze tubes, also known as caulk guns. When used correctly, it can help you save money on your energy bill and keep out drafts, water, and pests. Caulks and sealants are made to use inside or outside your home.
Silicone Caulk:
- Best for windows and bathrooms and outdoor use
- Very flexible
- Repels water
- Solvents required for clean up
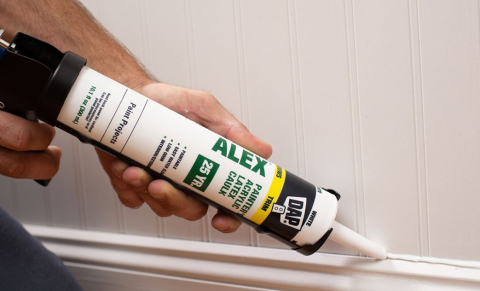
Latex Caulk:
- Best for drywall, wood, and masonry(stonework)
- Crown mouldings, baseboards, door frames and wood panelling
- Lasts up to 15 years.
- Cleans up with water.
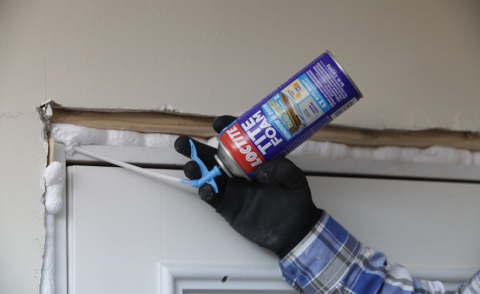
Expandable Foam Caulk:
- Best for electrical outlets, exterior pipes, and window jambs
- Dampening sound
- Can repair cracks in the foundation.
Butyl-Rubber Caulk:
- For outdoor use only
- Good for gutters, sidings, and concrete
- Best exterior caulk for roofing
- Difficult to clean up
What is the difference between caulk and sealant?
Caulk:
- Waterproof
- Expands with temperature changes
- More rigid than sealants when dry
- Seals joints between building materials
Sealant:
- Better in spaces prone to frequent expansion and contraction
- Superior elasticity
- Flexibility lasts longer in areas with higher moisture levels
- Use on areas like windows, the bathroom and kitchen
Sanded vs Unsanded Caulk:
Sanded caulk:
- Adheres better to wet surfaces
- Expands in more significant gaps without cracking
- Best on joints 1/8 or wider
- Grainy texture
Unsanded Caulk:
- Mostly used on countertops and backsplashes
- Best on tight joints under 1/8 inches wide
- Smooth texture
Regular vs fast-drying:
Regular:
- Dry to touch in 30 minutes.
- Can take up to 24 hours to cure.
- Fully waterproof.
Fast Drying:
- Referred to as ‘painter caulk.’
- Most can be painted on after 1 hour or less.
- Best for areas that stay dry.
Tools and accessories:
Caulk gun:
- Helps ensure even application.
- Prevents dripping and arm fatigue.
Backer Rods:
- Used as backing in joints or cracks to help control the amount of sealant or caulking used.
- Lengths of foam used to fill gaps before caulking.
Caulking Spatula:
- Helps remove old caulk/sealant without scratching tile or other surfaces.
- Helps smooth out caulk/sealant when just applied for a clean finish.
Caulk Strips:
- Similar to weatherstripping, are pre-shaped rolls of sealant with a peel-and-stick.
By following these and other tips you can reduce your energy bills, improve heat retention and thermal consistency throughout your home, avoid black mould outbreaks, and help keep you and your family safe and warm through these cold winter months.
By: Tricia Cook, Content Navigator